

Day 10: Mastering Git & GitHub: Advanced Strategies for DevOps Mavericks

🚀 Aspiring DevOps Engineer | Automation Enthusiast 🤖 🔧 Bridging Dev and Ops to streamline software delivery and boost productivity. 📚 Learning CI/CD, containerization, and infrastructure as code for better software workflows. 💡 Passionate about optimizing processes and reducing manual tasks for top-notch software quality. 🛠️ Exploring DevOps tools: Docker, Kubernetes, Jenkins, Terraform, and more. 🌐 Let's connect, learn, and grow together in the exciting world of DevOps! 🌱
GitHub is the main focus for many big companies and open-source project maintainers and contributors to showcase their contributions. Many people think Github is more of pulling requests and merging codes.
But that's not the case Github is more advanced than many people think. Today let's learn about a few more advanced concepts of GitHub such as
Branching
Revert & Reset
Rebase & Merge
Git Branching
Imagine you're working on a big project with your team. Git branching is like having multiple versions of your project at the same time.
Here's how it works:
Main Branch (Master/Branch): This is like the main road where everyone starts. It's called the master branch. This branch represents the current stable version of your project.
Creating a Branch: When you want to work on something new, like adding a feature or fixing a bug, you create a new branch. Think of it like taking a detour from the main road. This new branch starts from where the main branch is.
Making Changes: Now, you make changes to your project in this new branch. You can experiment freely without affecting the main road (master branch).
Committing Changes: As you work, you save your progress with commits. These are like snapshots of your project at different points in time. Each commit has a unique ID.
Merging: Once you're happy with your changes and they're tested, you can merge your branch back into the main road (master branch). It's like taking the detour back onto the main road.
Resolving Conflicts: Sometimes, when you merge, there might be conflicts, like two people changing the same part of the project differently. Git helps you resolve these conflicts.
Deleting Branches: After merging, you can delete the branch you worked on. It's like closing the detour once you're back on the main road.
By using branches, you can work on different parts of the project simultaneously without interfering with each other. It keeps your project organized and makes collaboration smoother.
Git Revert and Git Reset
1. Git Revert:
Imagine you made a change in your project that turned out to be a mistake, like adding a feature that caused issues. Reverting is like undoing that mistake without erasing the history of what happened.
How it works: When you revert a commit, Git creates a new commit that undoes the changes introduced by the previous commit. So, it doesn't erase the mistake; it just adds another commit that undoes it.
Example: Let's say you added a new feature in commit A, and it caused problems. You can use
git revert Ato create a new commit that undoes the changes made in commit A.Use case: Reverting is useful when you want to undo a change while preserving the project's history. It's a safe way to fix mistakes without losing track of what happened.
2. Git Reset:
Resetting is like rewinding your project's history to a specific point in time. It can be a powerful tool, but you need to be careful because it can erase history.
How it works: When you reset to a previous commit, Git moves the HEAD (the pointer to the current branch) to that commit. Depending on the reset mode, it can also change the staging area and working directory.
Example: Let's say you made some commits (A, B, C) but realized that commit B introduced a bug, and you want to go back to before that commit. You can use
git reset --hard HEAD~2to move the HEAD two commits back and erase the changes made in commits B and C.Use case: Resetting is useful when you want to rewrite history or start fresh from a certain point. However, it should be used with caution because it can make you lose commits permanently.
In summary, git revert undoes changes by creating a new commit, while git reset rewinds history by moving the HEAD pointer and possibly changing the staging area and working directory. Reverting is safer for undoing changes while preserving history, while resetting is more powerful but riskier as it can erase history.
Git Rebase
Imagine you're working on a project with others, and everyone is making changes. Git rebase is like reorganizing your changes to make them look like they were added on top of everyone else's changes.
Here's how it works:
Starting Point: You have your branch, let's call it "your-branch," where you've made some commits.
Pulling Changes: Meanwhile, others have been working on the same project and have made commits to the main branch (often called "master" or "main").
Rebasing: Instead of merging their changes into your branch directly, you can rebase your changes on top of theirs. It's like taking your commits and putting them on top of the latest changes from others.
Changes Placement: Git rebase will rewind your branch back to where it diverged from the main branch. Then, it applies the new commits from the main branch one by one. Finally, it reapplies your commits on top of the latest changes.
Conflict Resolution: If there are conflicts between your changes and the changes from others, Git will pause and let you resolve them. Once conflicts are resolved, you continue the rebase process.
Finishing: After all the changes are successfully applied, your branch now looks like it was created after everyone else's changes. This keeps the project history cleaner and makes it easier to understand the chronological order of changes.
In simple terms, Git rebase is like updating your work to fit the latest changes from others as if you started working on it now. It's a way to keep your changes in sync with the evolving project without creating messy merge commits.
Git Merge
Imagine you and your friend are working on a story together. Git merge is like combining your work with your friend's work to create one final story.
Here's how it works:
Starting Point: You both start with your own copies of the story, working separately on different parts.
Making Changes: You write your part of the story, and your friend writes theirs. Each of you saves your changes along the way.
Merging: When you're both done and want to combine your parts into one complete story, you merge your work. It's like putting your friend's changes together with yours to create the final version of the story.
Resolving Conflicts: Sometimes, you and your friend might make changes to the same part of the story. When you merge, Git will let you know if there are any conflicts, and you'll need to decide how to resolve them – like agreeing on which version of a sentence to use.
Final Result: After resolving any conflicts, Git creates a new commit that combines both of your changes. Now, you have one complete story that includes both your parts.
In simple terms, Git merge is like combining different pieces of work from different people into one cohesive whole. It's a way to bring together changes from separate branches and create a unified version of the project.
Tasks
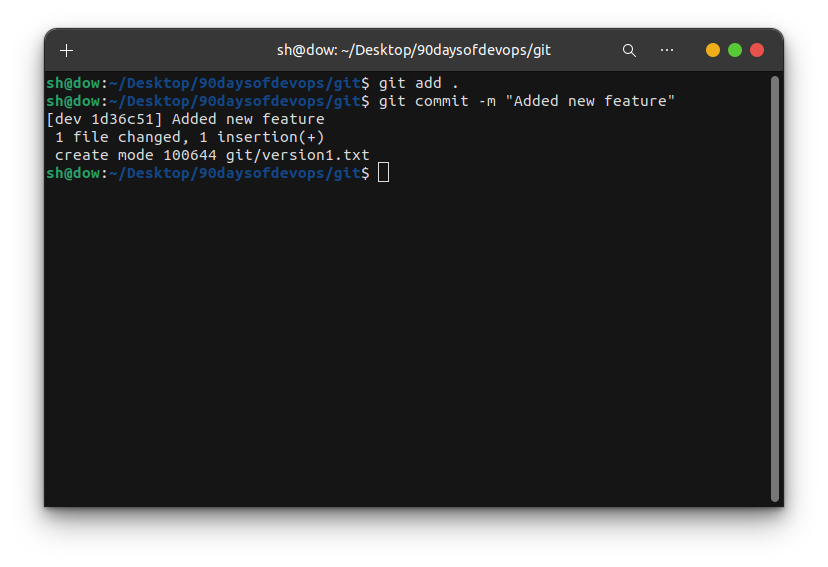
Add a text file called version01.txt inside the Devops/Git/ with “This is first feature of our application” written inside. This should be in a branch coming from master, [hint try git checkout -b dev], swithch to dev branch ( Make sure your commit message will reflect as "Added new feature"). [Hint use your knowledge of creating branches and Git commit command]
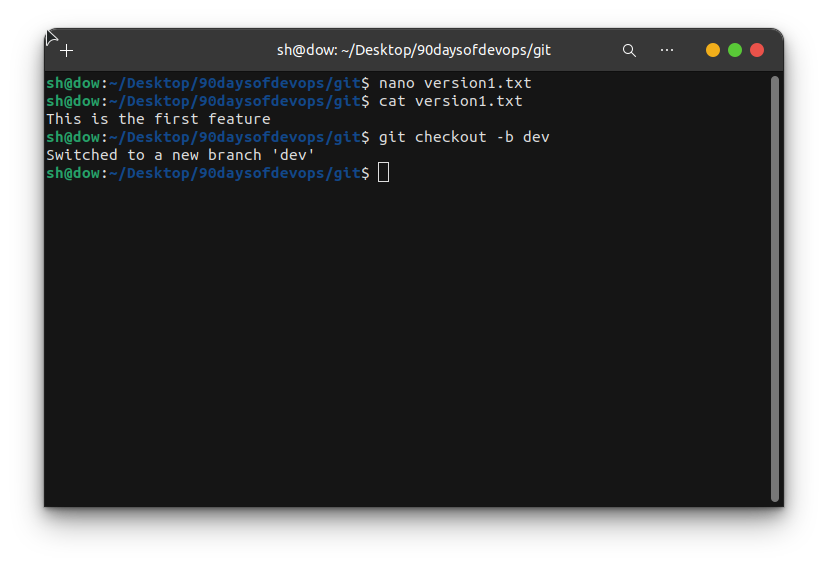
commited message with added new feature
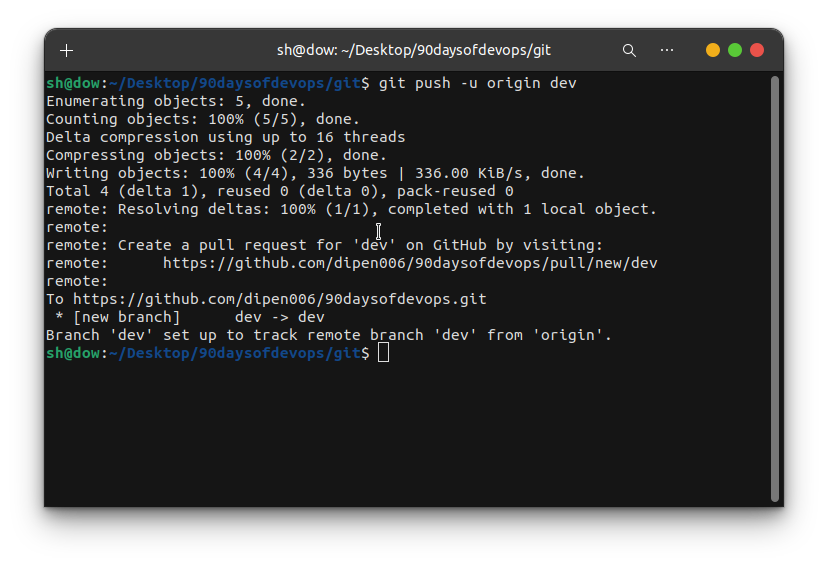
version01.txt should reflect at local repo first followed by Remote repo for review. [Hint use your knowledge of Git push and git pull commands here]
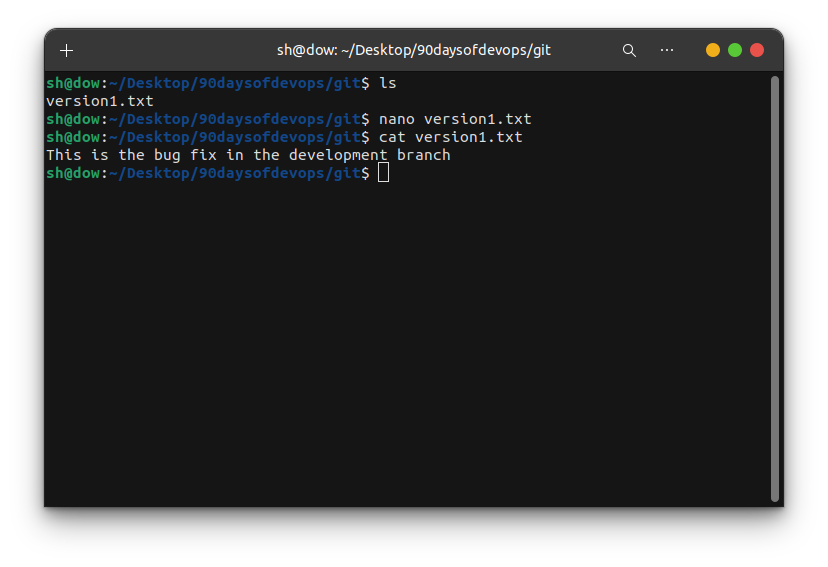
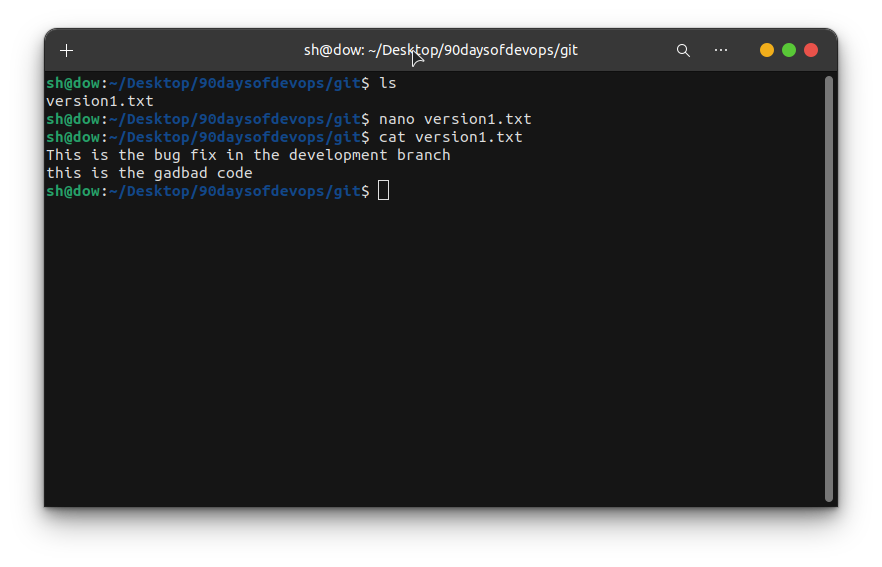
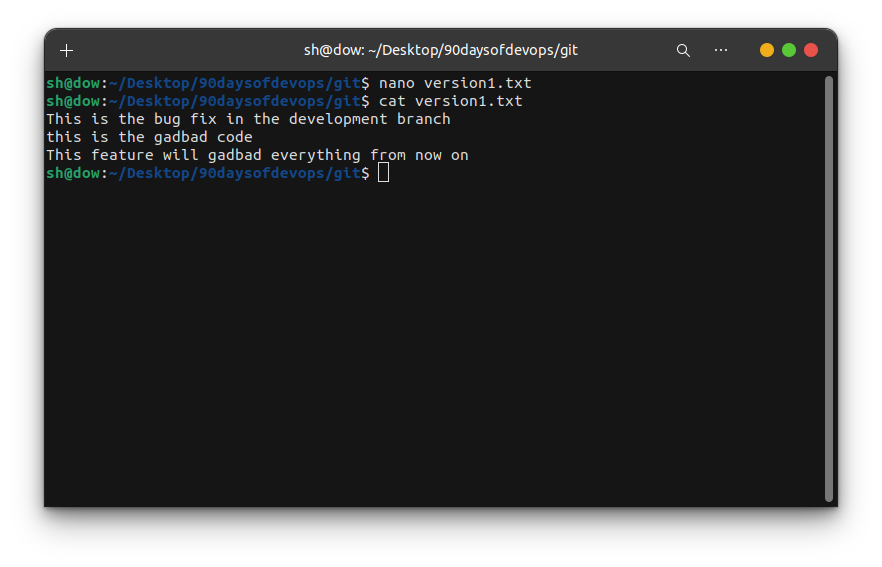
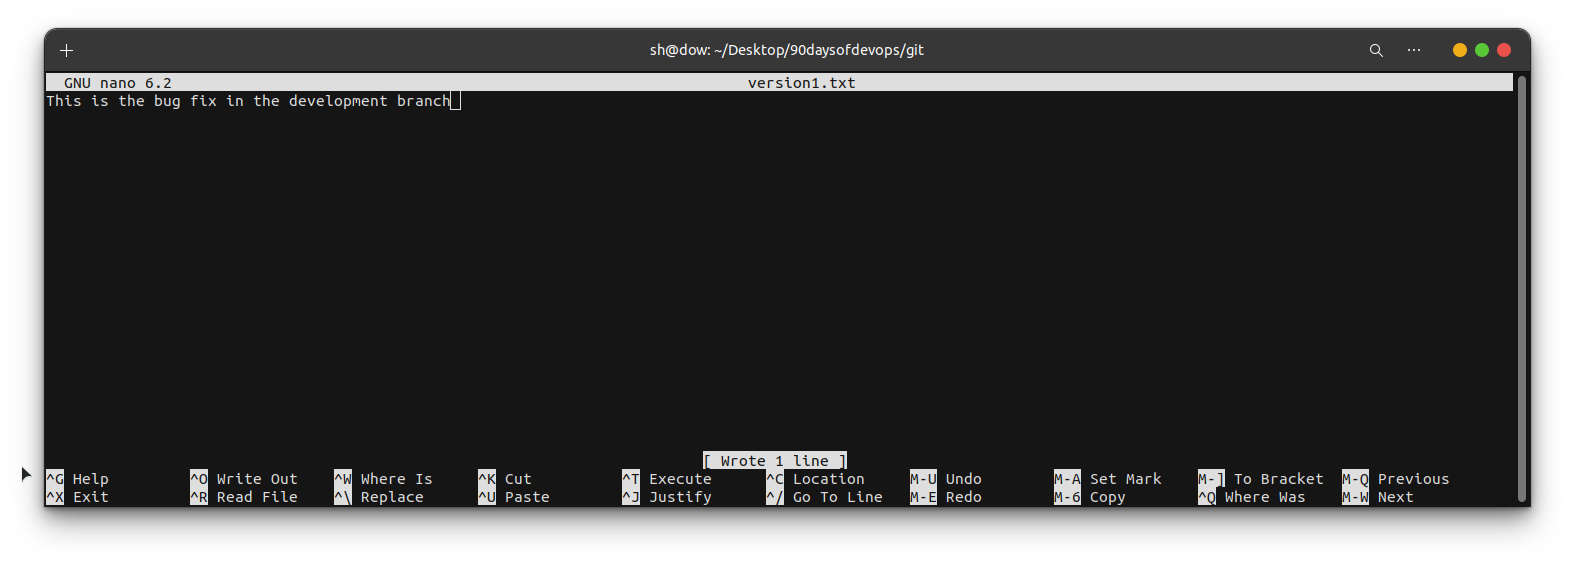
Add new commit in dev branch after adding below mentioned content in Devops/Git/version01.txt: While writing the file make sure you write these lines
1st line>> This is the bug fix in development branch
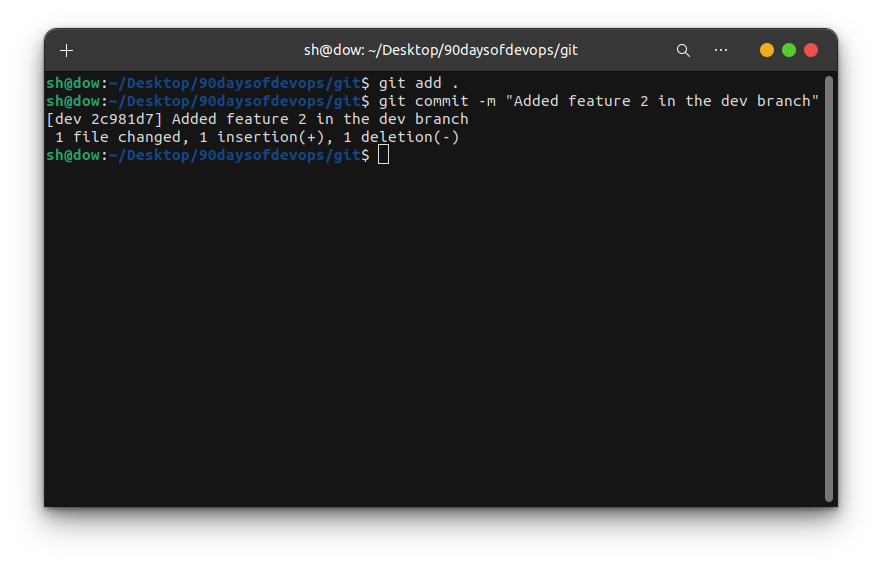
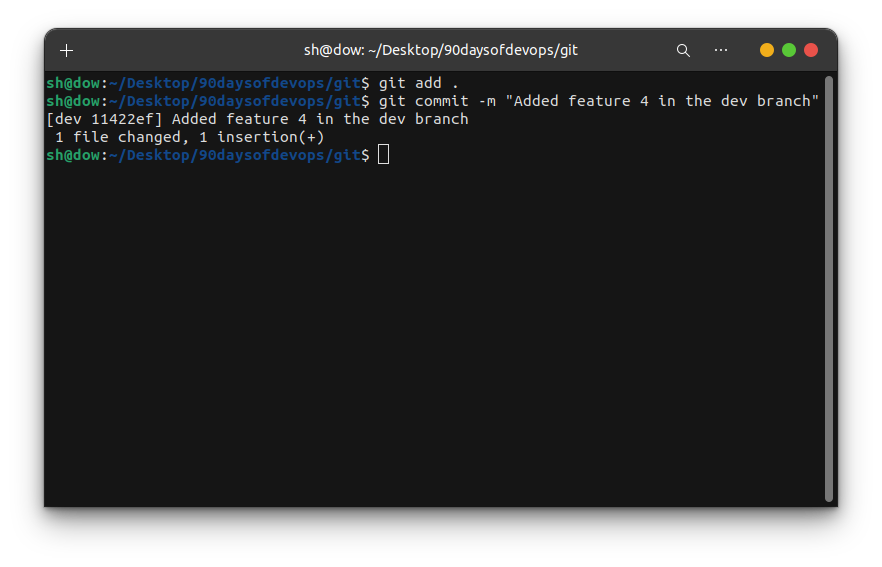
Commit this with message “ Added feature2 in development branch”
2nd line>> This is gadbad code
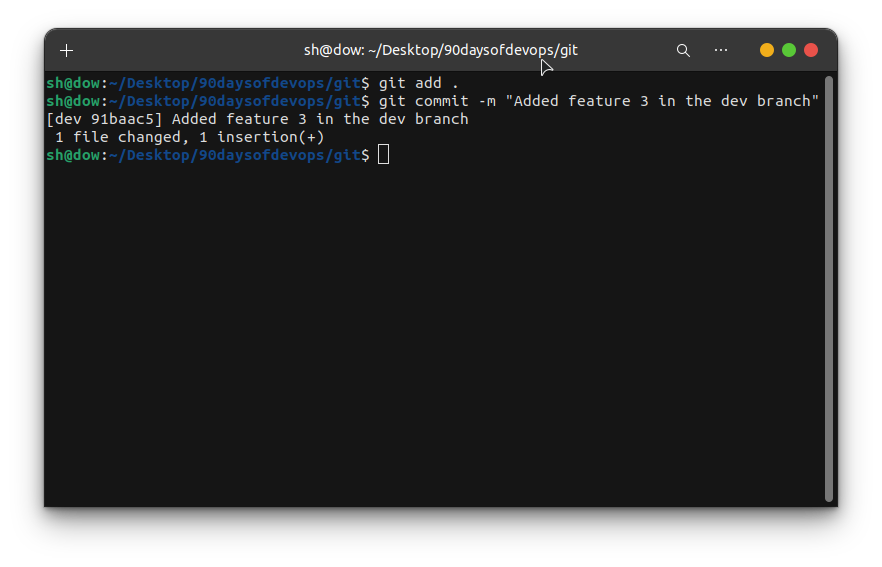
Commit this with message “ Added feature3 in development branch
3rd line>> This feature will gadbad everything from now.
Commit with message “ Added feature4 in development branch
Restore the file to a previous version where the content should be “This is the bug fix in the development branch” [Hint use git revert or reset according to your knowledge]
use the git log to check the hash
git log
use the git revert to return the to previous commit which you want
git revert #
Task 2:
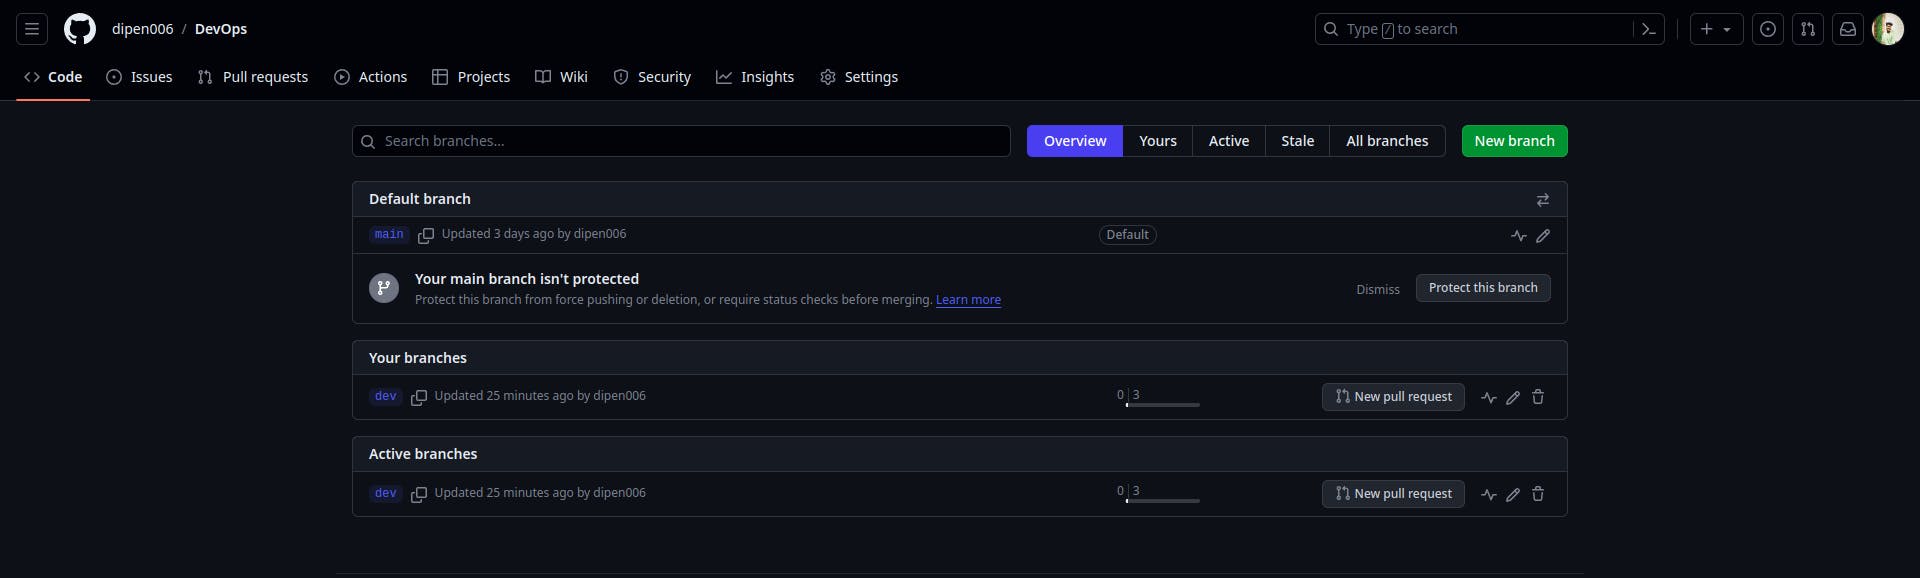
Demonstrate the concept of branches with 2 or more branches with screenshot.
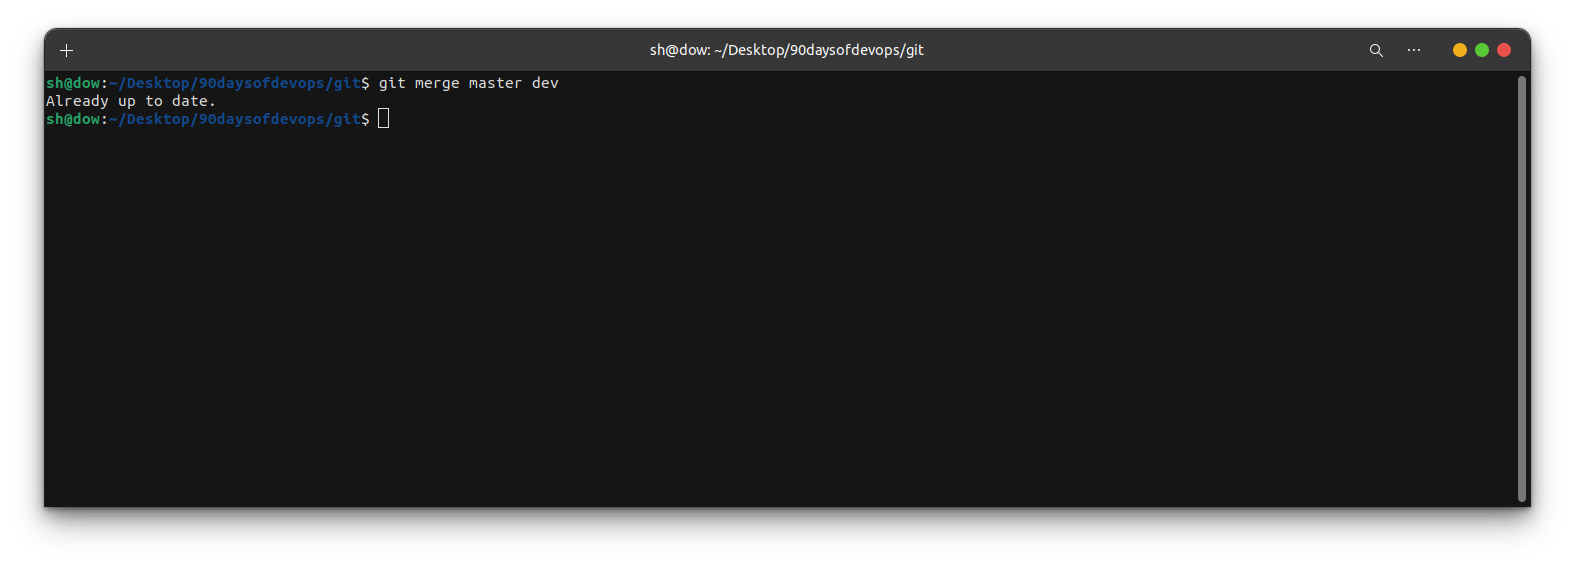
I used the command before without taking screenshots. That's why it's showing up to date
add some changes to dev branch and merge that branch in master
"Fuel my passion and support my journey by clicking 'Buy me a coffee' today!"
~Dipen ; )


